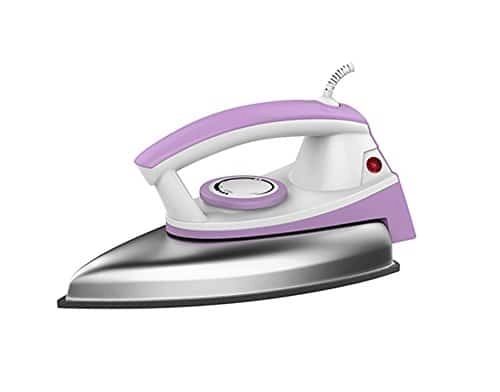
Usha EI 2102 1000-Watt Dry Iron


About Product:
Dimensions
| Length: | Width: | Height: | |
| Product: | |||
| Package: |
Legal Metrology
| Part/ Model Number: | |||
| Country Of Origin: | |||
| Manufacturer: | |||
| Importer Contact Information: | |||
| Included Components: | |||
Toll Free Number: 1800 1033 111
Charges for Installation: RsThe installation charges for Usha brand fans vary
Installation Process:-
Installation Process for Usha Fans
1. Call Usha customer support at 1800-1033-111 to schedule an installation appointment for your fan.
2. Provide the customer support representative with your personal details and the model number of the fan you wish to install.
3. Once the appointment is confirmed, note down the service request number provided by the customer support representative.
4. On the day of installation, make sure to keep the following items ready:
- Usha fan
- Installation kit (provided with the fan)
- Electric drill
- Screwdriver
- Step ladder
- Electrical tape
- Masking tape
- Marker
- Measuring tape
5. The installation technician will arrive at the scheduled time and date. Show them the location where you want the fan to be installed.
6. The technician will assess the location and make necessary markings for drilling holes.
7. Using the electric drill, the technician will drill holes in the ceiling as per the markings.
8. The fan will then be mounted on the ceiling using the installation kit and screws provided.
9. The technician will then connect the fan to the electrical wiring and secure it with electrical tape.
10. Once the fan is securely installed, the technician will test it to ensure it is functioning properly.
11. If you have any queries or concerns, feel free to ask the technician for assistance.
12. Once the installation is complete, make sure to collect the installation warranty card and the receipt for future reference.
13. You can also register your fan on the Usha website for additional warranty benefits.
14. Congratulations, your Usha fan is now successfully installed and ready to use! Enjoy the cool breeze!
Related products


Post Query/ Review/ Request (Rs. 50 Reward)
Product Queries (0)
There are no queries.
Available in Renewed Condition (0)
There are no products.
Contact Info
- Address: 1, 12 Biswa, Near Akash Public School, Gurgaon Village
- Phone: +919711995959 , +918930313030
- Email: [email protected]
Other Policies
Be A Seller
Apply Now

Media Coverage


Top Marketplace Seller
- Presence on all Top marketplaces from 8 years, Offering thousands of products
- Delivered 1 lac+ Order across India


Return/ Replacement
While less than 1% of our customers need any such policy but always Feel Secure with our 4D return/ replacement policy

Rewards
₹ 3When & How?
Once order for this product is delivered, it will be marked as completed and you will get this value in wallet which you can use for future purchases or Free Products

Rewards
₹ 50 for Review/ QuestionWhat for?
We not only answer your questions but also reward for asking it( or if you share a product exeprience in form of review). You end up getting your answers as well as you keep on getting more discount with each contribution in form of question or review

Selling Used Product?
Get Resale/ Exchange OffersHow does it work?
If you are looking to replace any of product you are using, you may submit it to us to get an estimate of how much exchange value will you get, apart from this it will be displayed to all of our customers for buying from any city. when a buyer or our team is ready with an offer, you will be intimated immediately

Buying more products?
Save more on CombosHow does this work?
When you buy more than one products we provide unmatchable offer. Submit your requirements and if any exising offers you have and we will surely give you better than what you have:

Exclusive Plan
The Best Price you can get anywhere.How does it work?
We understand, several projects need regular and bulk purchasess from different categories, different brands, different cities. We are saving all the hassle and communication time for you by making it easy, when you get access to our tool, you can see all our sourcing prices directly with a small search
For Designers
For Architects
For Builders
For Corporates

